
Preparing for Freeze Drying
Freeze drying at home can be a game-changer for food preservation, allowing you to extend the shelf life of your favorite foods while maintaining their nutritional value and flavor. Whether you’re new to freeze drying or looking to refine your technique, this step-by-step guide will help you through the process. From preparation to storage, we’ll cover all the essential steps to ensure successful freeze drying at home.
Pre-Freeze: Best Practices
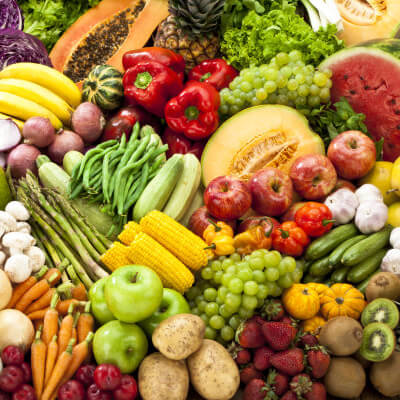
Before you start the freeze drying process, it’s essential to pre-freeze your foods. This step helps to expedite the drying process and ensures better results. Here are some best practices for pre-freezing:
- Clean and Prep: Wash and cut your fruits, vegetables, or meats into uniform pieces. This ensures even drying.
- Blanch Vegetables: For some vegetables, such as green beans, broccoli, and asparagus, blanching (briefly boiling and then cooling in ice water) can help preserve color and texture.
- Spread Evenly: Lay out the food items in a single layer on a baking sheet or tray. Avoid overcrowding to ensure even freezing.
- Freeze Thoroughly: Place the trays in your freezer for a minimum of 24 hours. Make sure the food is completely frozen before moving on to the freeze dryer.
Pre-freezing helps to reduce the overall drying time and improves the quality of the final product.
Loading: Tips for Arranging Food in the Freeze Dryer
Proper loading of your freeze dryer is crucial for efficient and effective drying. Follow these tips for the best results:
- Avoid Overcrowding: Arrange the food in a single layer on the freeze dryer trays. Overcrowding can hinder airflow and result in uneven drying.
- Use Silicone Mats: Consider using silicone mats on the trays to prevent sticking and make cleanup easier.
- Balance the Load: Distribute the food evenly across the trays and ensure that the load is balanced. Uneven loading can affect the performance of the freeze dryer.
- Label Trays: If you’re drying multiple types of food, label the trays to keep track of what you’re drying.
Properly loaded trays ensure that the freeze dryer works efficiently and that all food items dry evenly.
Drying Process: Monitoring and Adjusting Settings
Once your food is loaded, it’s time to start the drying process. Here are some tips for monitoring and adjusting settings:
- Follow Manufacturer’s Instructions: Each freeze dryer model may have specific instructions, so always refer to the manufacturer’s guidelines.
- Monitor Progress: Keep an eye on the drying process. Some foods may require longer drying times. Most freeze dryers come with a control panel that shows the progress.
- Adjust Settings: If your freeze dryer allows manual adjustments, you can tweak the temperature and drying time based on the type of food you’re drying. Typically, the process involves an initial freezing stage followed by a primary drying phase (sublimation) and a secondary drying phase (desorption).
- Check Dryness: Once the cycle is complete, check the food to ensure it is fully dry. Break a piece open – if there’s any moisture inside, run an additional drying cycle.
Monitoring and adjusting the settings as needed ensures that your food is thoroughly freeze-dried and ready for long-term storage.
Storage: Properly Storing Freeze-Dried Foods
Proper storage is essential to maintain the quality and longevity of your freeze-dried foods. Follow these steps for optimal storage:
- Use Airtight Containers: Store your freeze-dried foods in airtight containers such as vacuum-sealed bags, mason jars with oxygen absorbers, or mylar bags with desiccants.
- Label and Date: Clearly label each container with the contents and the date of freeze drying. This helps you keep track of inventory and ensures you use older items first.
- Store in a Cool, Dark Place: Keep your containers in a cool, dark, and dry environment to maximize shelf life. Avoid exposure to heat, light, and moisture, which can degrade the quality of the food.
- Check Seals Regularly: Periodically check the seals on your containers to ensure they remain intact and that no moisture has entered.
Proper storage ensures that your freeze-dried foods remain fresh and ready to use for an extended period.
Conclusion: Recap of Steps
Freeze drying at home is a rewarding process that allows you to preserve a wide variety of foods for long-term storage. By following these steps, you can ensure successful freeze drying every time:
- Preparation: Clean, prep, and, if necessary, blanch your foods.
- Pre-Freeze: Thoroughly pre-freeze your foods for at least 24 hours.
- Loading: Arrange the food in a single layer on the freeze dryer trays, avoiding overcrowding and balancing the load.
- Drying Process: Monitor and adjust the settings as needed, following the manufacturer’s instructions.
- Storage: Store the freeze-dried foods in airtight containers, label and date them, and keep them in a cool, dark place.